Thursday, December 31, 2009

Bolt On Neck Heel


The first series of steps for the neck attachment have been completed.

First I made the Carbon Fiber Sleeve that bonds into the raw Neck Block Pocket. The Carbon Fiber Sleeve adds strength and stability to the neck joint. There is no wood exposed in this area - the Spruce has been entombed by the Carbon Fiber - the idea here is to cancel out any effect humidity may have on swelling or shrinking the neck attachment. Also, the grain of the Maple rim is at a 90 degree angle to the Spruce Neck Block. Unidirectional Carbon Fiber is laminated across the spruce in the same direction as the Maple's grain. So what you have is strength is all direction - LOTS and LOTS of stable strength and a seal against moisture.

I use a single large bolt. I embed the bolt's nut into the Basswood heel and plug it with a hardwood plug. Everything is set in with Epoxy. She ain't coming out!

I had a custom Ball End Allan Key made that has been lengthened to the length of the guitar. I insert it into the tail block access hole, through the guitar and into the deep head bolt at the neck block. The ball end allows for tightening the bolt at an angle.

Many little alignment jigs are used to dill all the holes. Taking one's time to ensure that everything lines up with the guitar's true center is an absolute. Center line alignment is crucial. I am thrilled to say that this mission has been a complete and total success.

Next, I will glue the Basswood Heel to the Maple neck.

Tuesday, December 29, 2009

Keep the Faith


This little guy is my source of hope. Someone designed this bobble Octopussy, tooled up for it's mass production, packaged it and distributed it to stores that added it to their inventory and shelf space. Apparently you can get these in a rainbow of colours. Each tentacle is attached with a tiny spring and I estimate that there are 18 unique pieces that make up this display figure. Think about the manufacturing processes that it took to get the first run made. Think about the money and time. Overhead. There is a market for this thing large enough to justify it's existence. WOW!

Great day in the shop. Glued a AAA bookmatched set of Sitka together for the top. The billet of wood I bought was the lightest one of the bunch - not just by a little but by a noticeable amount. Nice tight grain and colour. I put my hand plane to the glue edges and achieved a perfectly straight line. The two halves clamped together evenly - no excessive clamp pressure should ever be used to force two pieces of wood together. Forcing wood together practically seals it's fate to split later in life.

My Carbon Fiber arrived today and I will be making the neck sleeve tomorrow along with doing the second layer of CF in the rim.

Sunday, December 27, 2009

Glued on the Fretboard


The Ebony fretboard has been cut, glued to the neck and is under clamp pressure until tomorrow morn. The look of the neck is going to be dead simple - Flame Maple and Ebony. The fretboard bindings are going to be Ebony with white side dots.
LOVE IT!

Aesthetics


Today I finalized the way Vicky's bindings are going to look. I have chosen a very understated look with black white black perflings with a blood wood centre. Vicky is destined to be a hottie!

Boo Boo Monkey


Presenting our beloved dog, Boo Boo Monkey. I've known Boo Boo for twelve years. She came with my wife and when I first met this pooch her face was jet black. She was the world's best Frisbee dog. Now she's like fine wine, mellow and can easily stain things (use your imagination). If I didn't love her so much she would have met her untimely demise a long time ago. Her registered name is Demona. Hey...that's a cool name for a guitar!

Saturday, December 26, 2009

Neck Pocket


I managed to rout in the neck pocket into Vicky's rim. This is the largest neck pocket I have ever been able to achieve. More neck joint means more sustain. I also finalized my jig design for this procedure.

The routing is done with the guitar rim laying flat on the bench. I have a jig that straddles the rim and I rout in with my trim router from above. The jig is angled at a perfect 4.5 degree angle to get the right playing geometry.

The next step is to make the carbon fiber sleeve that will bond into this raw opening. The CF will make this joint stable and strong - extremely reliable. The neck joint is designed to be shimmed if a slightly different neck angle is desired. I use a single bolt that goes through the neck block spruce. I will also be adding on a heel cap to the rim which will have two small anchoring bolts that will thread into the neck heel. Nice and simple neck joint = an easy to disassemble guitar

Christmas


Christmas always seems to come at the wrong time of year. I long for the day when I don't have to have my rational eye on my finances. Awe, to escape feelings of guilt during the season of giving - I hate seeing it as the season of paying.

Some Christmas magic did swirl around our abode a bit. I sold my 1948 Packard Woodie to a gentleman who has a restoration business. He met my price and wired the money into my account. Now I can afford some more hang time until other opportunities come my way. Ontario Art Council grants are announced in February and I'm crossing my fingers.

Also, I got the gift I asked for and I'm over the moon about it! Check out my sweater! It's a George Bailey replica from the movie It's a Wonderful Life. I can't believe that Annette and Roxanne came through - the gift was from Santa but I know better. I was blown away - it took a lot of thought and effort to pull this gift off. This is gift giving at it's best!

I got the family a membership at the YMCA. We need balance and a positive outlet to share with each other and this is a great way to do it. Getting back in shape has been on my to do list for about a decade now - so it was time. Having something to do with the kids is sweet - I get depressed watching them stay in their PJs until lunch time on the weekends. NO MORE! Let's go swimming.

Monday, December 21, 2009

Strength and Stability


This pictures shows the Carbon Fiber overlay on the Spruce neck block. I laminated the unidirectional 11 oz tape with the Carbon fibers going across the Spruce's grain. This adds strength and stability to the neck joint and keeps the spruce from ever spitting along it's own grain. The neck block is spread wide with the idea of creating lots of sustain. With the way my guitars are constructed I can leave extra thickness at the neck area and when graduate the thickness of the rim as I approach the waist of the guitar. Any questions on this - drop me a line at: rizoratzo@aol.com

Think In Chunks


The neck block is set in in segments. This is the only way to do a nice tightly fitted job. It's a lot easier to scribe in one section at a time and then laminate them all together rather than attempting to fit in one solid block.

My guitars are like sculptures on the inside and the outside. Fairing concave surfaces and blending in these Spruce pieces is a lot of finicky work and I'm sure that other luthiers must think I'm nuts. I am nuts but this is my art and if you want wood to do the impossible you better expect a lot of good old fashioned honest labour. It does not come easy. Besides, easy is boring. You don't become a master without challenging yourself and taking your skill set to unexplored territory. I'm earning my stripes with every guitar I build.

One think I HATE hearing people say is "well...someones got a lot of time on their hands." A fellow luthier actually said this to me during my debut at the Montreal Guitar Show while raked his thumb extra hard along Ruthy's strings. I was hurt. Thinking about it...what was his point?

Yes, the guitars are a lot of work but I get an enormous amount of satisfaction from creating them. I can't imagine not putting this much effort into a boutique calibre guitar.

It's all about the Prep Work


Today I was torn between feeling like a free spirit artist type in the midst of processing his art form and a slave grunt wearing a dust mask longing for the end. This is the ugly part of the guitar's construction. Working with composites and epoxy can be a messy affair and I was reluctant to post these ugly pictures. It's all about prep work at this stage. Smoothing out the transitions and prepairing a perfect surface for the final layer of Carbon Fiber is very important and worth the extra time spent. One thing that you do not want is air voids under the CF. So the key is to sculpt the Spruce neck and tail blocks in with nice slow easy to laminate to transitions - no abrupt corners. For this task I use patience, perseverance and a pneumatic sanding ball with an 80 grit sleeve.

Sunday, December 20, 2009

Happy Holidays from the Dagmar Family!


I have been doing the Christmas thang with my wee family, kickin' back and enjoying the season. Here is the Dagmar staff enjoying breakfast with Santa. Every year my wife's work place puts on a huge breakfast spread where the employees kids get to visit with Santa and Mrs Clause. Every boy and girl are given a quality gift and it truly is an enjoyable morning. There are crafts for the kids, a free coat check, professional family portraits, fresh coffee, stacks of flapjacks, gangs of bacon and mountains of almost cold scrambled eggs. Mmmmmm yumm :)The eggs are actually pretty good if your there at the right time.

SMILE SANTA!!! YOUR SCARING MY KIDS!!! What ever happened to the Ho Ho Ho???

I have been steeling time in the shop whenever my wife is not looking. I have managed to set in the Spruce neck and tail blocks and prepped these areas for a single Carbon Fiber overlay. I'll be posting pictures at the end of tomorrow.

I am waiting for my Carbon Fiber twill weave to be delivered that will be used for the second lamination. I'd like to start shaping the rim and shaving the wood down.

I have designed this guitar to join the body at the 12th fret. The guitar's bridge will be more in the wider part of the lower bout where the sweetness is. Vicky will have a compact feel still maintaining a 25" scale and full reach to the 21st fret.

I'm excited about this guitar!

Thursday, December 17, 2009

The Neck


It has not been an overly productive week in the shop. I have been very busy with scouting out more promo opportunities and looking for various suppliers for various things. However, I have managed to do a number of steps with Vicky's neck.

After I unclamped Vicky's neck from the initial glue up I honed up the fret board and peghead face surfaces. There was a lot of extra Carbon Fiber protruding from these surfaces and I spent a good chunk of time taking it down by hand using an extruded piece of aluminum bar as the ultimate sanding block. I achieved perfectly flat surfaces. Carbon Fiber is rough on machine blades. I originally sent the neck through my jointer and sparks flew up! Doing this step by hand is worth the extra time I think.

I then turned the neck around and taped the neck onto a wedge shaped jig bed. With my over head router I planed the slight taper on both the main neck and peghead setting the final tapers and thicknesses.

I when transition sanded and blended the peghead to the rest of the neck. Once a perfect transition was met I glued on a stellar piece of Ebony veneer. The Ebony adds strength to this transition area.

Next, I turned the neck back around and routed out a large area of the Maple center that follows the taper of the neck. I set in a perfectly quarter sawn piece of Spruce. The Spruce runs right into the peghead area and adds strength to the transition. I also did a before and after weigh in and managed to save a full 2 ozs! Adding strength and losing weight is what it's all about.

The last few steps were to rout in for the two way adjustable truss rod and glue on the peghead Ebony veneer along with trimming the peghead to final dimension with my peghead router template.

More work on the neck will be executed tomorrow. I would also like to glue in the neck block and tail block Spruce into the guitar rim.

Monday, December 14, 2009

Feedback

I encourage feedback on this project and invite any and all to drop me a line at rizoratzo@aol.com

I am motoring right along and soon I will have to come to decisions about aesthetics and fun stuff like that. So don't just learch, participate! You can help develop the world's first photonic guitar!

1st Layer of Carbon Fiber & Neck Lamination


The first layer of Carbon Fiber was laminated into the rim today. I have the rim slipped into a Pattern Sleeve (or cradle) so that I can spin the rim around and prevent too much of a mess from happening. The sleeve also doubles as the router pattern for the opening of the Bass wood glue surface and defines the final dimension of the sound plates.

In the foreground of the picture is Vicky's neck all laminated together with the Carbon Fiber. The clamping is done at very low pressure as not to squeeze too much of the Epoxy out of the Carbon Fiber tape. If you clamp with excessive pressure you starve the joint and it's strength becomes compromised.

Sunday, December 13, 2009

Rough Neck


Vicky's neck will be made of 9 laminations. Five will be wood and four will be 11 oz carbon fiber. The carbon fiber adds a significant amount of stiffness and when combined with the cooked stabilized Maple this neck will be very reliable. Humidity changes will have little effect on the neck's trueness.

The carbon fiber runs the entire length of the neck and will add a lot of strength in the transition area to the peghead where the wood grain is short.

I will also lay in a two way adjustable truss rod to help dial in the perfect amount of relief. The heel will be made mostly of Bass wood to save weight.

The middle piece of Maple is tapered to follow the shape of the neck and adds an attractive refined look.

The fretboard is an Ebony 25" scale with a 12" radius.

Thursday, December 10, 2009

Back Side of Tailpiece


Here you can see the large hog outs in the string load and hinge area. I took out as much mass as possible with out compromising structural integrity. It's a pretty poopy picture but you can see I have bonded in a piece of brass where the string loops will butt against. The brass is V shaped for a reason. I bend the brass into a V then I grind a taper from the middle to each end. This sets the brass piece so that it angles toward the back of the tailpiece. This negative angle prevents the strings from slipping off when re stringing. The string tension does must of the work at keeping the strings anchored. I love the look of a bottom loading tailpiece but I didn't want extra confusion for the string anchoring system. Some builders rout in complicated slots or use L shaped brass - my method just seemed simple and light. It works great!

I use a rustic Iron hinge for the body attachment. I chose rusted Iron because it reminds me of my love for Hot Rods and of the Art Deco depictions of labourers erecting skyscrapers with sledge hammers and rivets. I form the flat Iron around the jackposts in my basement with brutish blows from a wooden mallet. Using this humble looking material is kind of an artistic statement about celebrating backyard ingenuity and not always having to raise the bar.

Vicky's Tailpeice


Today I roughed out the tailpiece from a beautiful blank of Ebony. I have invented a very slick jig that allows me to slip the Ebony blank into a pocket. On either side of this pocket there are various router guides to rout out the string load area and for the hinge. I hog out a lot of mass from the underside in the effort to save weight. The tailpiece may have a chunky look to it but it's much lighter than it looks. When asking players what they want in a dream guitar almost all mention sustain. A tailpiece that has more mass is believed to have greater sustain. My tailpiece is not the lightest nor the heaviest but the sustain on my guitars is great. I think sustain comes from other areas of the guitar and not so much the tailpiece. By reducing the weight is this area of the guitar I hope to achieve perfect lap balance. I want this guitar to sit level in the players lap. And it will. I hope.

Finalized Rim


This is the picture I meant to post showing the finished Bass wood rim. Notice the peninsula of extra wood at the neck area. This little jut out allows for more mass in the neck block - this will become more clear once I put the spruce in this area and rout the neck pocket. The next step from this point is to lay in the carbon fiber. Once that's done I start shaving off the extra wood to lighten the instrument. One of the themes of this project is to save weight. The rim, as pictured, tips the scales at 1 lbs 8 ozs. Looking back in my notes Vicky is a little over 7 ozs lighter than Mary Lou W was at this point in construction. I'm hoping that once the rim is completely finished it will remain at this weight. I'm going to predict that the complete guitar, strings and all, will be 5 lbs 9 ozs.

Tuesday, December 8, 2009

Vicky at days end


Today was all about finding the true center and trimming the Bass wood glue surface to final dimension. The picture shows the rim ready for tomorrows procedure of routing in the rabit for the sound plates. You can see a little peninsula of extra wood where the neck joint will be. This need for this extra wood will become more clear when I rout in the neck joint.

It was a lot of careful work to get to this point. I have to think of the final form and reverse engineer and anticipate for all kinds of considerations. For example, the rabit for the sound plates is 1/4" and then there will be multiple binding. I have not shown it but there is a number of patterns and one master jig that had to be made to get to this point. Every guitar has been a true one off. Every guitar has it's own unique tooling. Every guitar is just as much a sculpture as it is a guitar. No two guitars will ever be exactly alike and I think that's pretty special.

Vicky Inside


Here you can see the inside concave surface. This interior produces an amphitheatre within the guitar. If you were to put the rim over your head and speak into it you would hear your own voice become more loud and clear within your own ears. This is what makes Dagmar Custom Guitars exclusively unique. I would love to have my guitars acoustically tested in a scientific data measurement kind of a way to see what exactly this construction does to the sound/tone. The guitars that I have built all sound great with beautiful response and balance. Acoustic science seems to have a subjective conclusion - perhaps one of the only sciences that does.

This surface will be laminated with Carbon Fiber. The shiny line where the Bass wood meets the Maple is cured epoxy. I use epoxy here to help fair the transition - to slow the curve a bit for easier lay in of the carbon fiber.

Vicky


This picture shows Vicky at the start of the day. The glue surface rim needs to be trimmed to final width and the true centre still needs to be determined. The inside of the rim has been faired to about 85% finish and as she stands there is about 30 hours of labour. This is a brand new shape, different from Eve in that it is a 17" lower bout and I have changed the math and cutting at the cutaway for a more tighter looking curve. Every piece fit in just like it should and the rim is very true - no twisting or wondering anywhere. Only a little flat sanding was needed to get a nice level surface on both top and back.

Monday, December 7, 2009

Vicky the Photonic Guitar

Today was a productive day in the Dagmar Shop. I faired the inside of the Queen's guitar and named her Vicky after Queen Victoria who chartered Queen's University.
She is almost ready for the Carbon Fiber laminations. I'm thinking about using a different combination of Carbon Fiber in the efforts to save weight and add strength in the direction of the grain. I'm flirting with the idea to use 5.5 oz twill for one layer and 11 oz unidirectional for the second. With all of my previous guitars I've used two layers of 11 oz unidirectional. Using 5.5 oz twill might save a couple of ozs - must do some research.
Hmmmm....

Vicky is made of the same Cooked Maple as Mary Lou W except I have used Bass wood for the glue surface vs using Cooked Maple. This will save weight and Bass wood is traditional kerf wood. I'd like to use Cooked Maple for the back with a Sitka Spruce top.

I'm also thinking about introducing a traditional F hole design. I'm still up in the air about that.

The theme of the guitar is to do a simple aesthetic. The inlay around the outside of the soundplates will be black white black black white black. The fret board will be just Ebony with white side dots, The peg Head will have Ebony veneers on both top and back with Waverly tuners that have Ebony buttons. I will be using X Bracing using Sitka Spruce. The neck heel will be made largely of Bass wood and the rest will be my usual Cooked Flame Maple and Carbon Fiber nine lamination design with a two way adjustable truss rod.

The tail piece will be the Dagmar standard one with an Iron hinge. I am still thinking about the inlay. Maybe the Queen's "Q" or a crown. Hmmmmm....

I'd like this blog to be interactive and encourage my followers to write or comment on what they would like to see. You can post a comment on the blog or drop me a line at rizoratzo@aol.com. I'd love to hear some feedback.

Lastly, I am considering doing a hand rubbed sunburst to give the guitar a true vintage vibe.

I know I promised pictures today but tonight was dinner at the inlaws - My inlaws cooked me up a birthday Duck and it was divine! Pictures tomorrow.

What do you think?

Sunday, December 6, 2009

Photonic Guitar Link

This is a link to the Queen's Photonic guitar abstract.
http://www.chem.queensu.ca/people/faculty/loock/research.htm#_guitar

I hope to start posting pictures of the guitar tomorrow.

Saturday, December 5, 2009

Queen's University Photonic Guitar

Hi Pete :) and all other of my blog friends.

Today I finalized the shape of the Queen's guitar! She is a 17" single cutaway with a 3" body depth. The wood I chose is cooked flame maple (like Mary Lou W) and I must say that the wood Rene supplied me is the sickest stuff I have ever seen! This guitar is going to be pretty special I will be posting pictures soon. My brother is lending me his camera for the purpose of this blog and I just got it today. The pictures will start at the point where I laminate the carbon fiber in. All the work that I have done with the math and cutting procedure is still top secret as I finalize things. Sorry kids!

This should be an interesting journey as Dagmar Custom Guitars constructs and delivers the world's fist Photonic guitar to Queen's University.

Friday, December 4, 2009

Thursday, December 3, 2009

Biography

I am an emerging artist, self-taught in custom lutherie. In my first year of business as Dagmar Custom Guitars, I have succeeded in creating an innovative guitar design that has garnered international attention. The acceptance and excitement around my exclusively unique design has been both humbling and overwhelming.

I began woodworking several years ago, self-taught for practical reasons: I had bought a house and was determined to do the renovations myself. Watching TV shows such as The New Yankee Workshop and This Old House, I picked up tips and became inspired to design and build my own furniture as well. This interest soon became my passion. Even though I was enrolled in a Bachelor of Technology degree at Ryerson University, I decided to leave and make woodworking my life’s work.

While paying the bills with a job in graphic design, I took an Advanced Woodworking course at Niagara College to refine my skills. There I learned everything from shop safety, design and joinery to CNC milling and finishing. Upon the successful completion of this course I accepted a position with a local custom yacht building company, Saga Marine. Over a seven-year period I learned the art of boat building, which included how to read and loft plans, mold making, interior construction and installation along with a complete understanding of composite materials such as fiberglass, carbon fiber and resins.

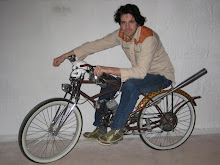
While at Saga Marine I continued to hone my woodworking skills on the weekends with various projects. I had great fun customizing vintage bicycles into motorized scooters. An idea, which intrigued me, was to find a way to make bicycle fenders out of wood. At this very time I had witnessed a colleague of mine construct a wooden urn - a vase shape using strips of wood cut and glued to shape using precisely-calculated angles. I was struck with the idea of curving wood tightly in two opposing directions. I drafted a plan to construct my first bicycle fender set, calculated all the angles needed and prepared the wood using precise machining. I dove headfirst into the project and was successful at making my first set of solid wood fenders. I took my bicycle to local car shows where it would always gather crowds of interested people. Admirers of the bicycle would sometimes call me an artist, something that I had never considered myself to be.

I developed my fender idea and discovered that I could reverse the curve at the back of the fender set creating a “ducktail”, which is a stylized line of the fender that swoops up at the rear. Once it was realized that I could change directions with the curve the idea of building a guitar rim and body came to me very clearly. I saw a more rewarding and marketable opportunity in the art of custom-made boutique guitars.

Having had such success as a self-taught woodworker, I chose to follow the same self-directed approach to lutherie. I became obsessed with learning about acoustics and guitar construction. I purchased or read everything I could find on the topic, including master luthier Bob Benedetto’s magnificent instructional set of DVD’s, which I studied intensely. The woodworking industry was hit hard even before the current recession, and while building the prototype of my new guitar I had to deal with being laid off twice from different employers. I took my prototype guitar and used it as the model for a business plan and was accepted into the Self Employment Benefits program for entrepreneurs through Niagara College. I was subsidized and mentored in my first year of business, which allowed me to dedicate myself full-time to my calling of becoming a custom guitar builder and innovator. Over this year I was able to evolve my prototype into three world-class guitars. The highlight was receiving the official invitation to show them at the prestigious Montreal Guitar Show. Being invited to participate in this show in the first year of one’s business is virtually unprecedented.

My debut at the Montreal Guitar Show was amazing! I received lots of attention from the media and had one of the busiest booths at the show. I made many contacts, one of which was the incredible opportunity to be commissioned by Queen’s University to build a guitar to help debut and develop their state of the art photonic pickup. Premier Guitar Magazine interviewed me for the video segment of their Montreal Guitar Show coverage (which is also available on YouTube). I have had two major articles written about me in local newspapers and recently scored the cover of Pulse Niagara Magazine. I have also been invited to submit pictures and text descriptions of my guitars for a book by the noted French author Antoine Pascal. The book is to be the most exhaustive collection of guitars in a single volume and will be published in French, German and English with global distribution. Finally, a short documentary film on my lutherie work is in development with Sheridan College.

My self-directed pursuit as an innovator into the world of custom lutherie has been fast and furious. I am humbled by the amount of attention my artistic expression, design and innovation has gathered and I am excited to have had such high levels of success in gaining recognition in such a short period of time. I look forward to developing my ideas even further and continuing a life-long career as a Canadian artist and innovator in the fascinating world of custom lutherie.

Wednesday, December 2, 2009

All About Eve

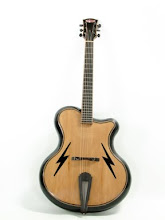
Eve is my prototype cutaway archtop. She is my largest guitar to date measuring 18" at the lower bout with a 3" body depth. I made this guitar with Ancient Kauri wood from New Zealand. A forest of these ancient trees was unearthed by Kiwi farmers and has been carbon dated at 50,000 years old.

It is an overwhelming and humbling thought to think that the wood had been in waiting for tens of thousands of years before it came to me to be made into Eve. I feel honoured by the wood and I am very proud of this guitar. It was lutherie romance at it's best rendering the Kauri into what I think is my most successful guitar to date.

To build Eve was an extreme challenge and at times I had my doubts that I would be able to finish her. This guitar fought me hard but with an enormous amount of patience and perseverance I became her master.

Kauri is a wonderful tone wood and the only gamble was to make all of Eve's parts from the same kind of wood. Usually guitars are made with a Spruce or Cedar top, hard wood sides and back, like Maple, with a Hard Maple neck or one of Mahogany. The unknown for me was whether or not all the parts would phase well with one another to produce a well balanced guitar that captured that traditional archtop sound. It did perfectly!

Her voice is smooth and mellow with a belly rubbing bass, long sustain and a resonance that can produce a faint flangey effect when the strings are picked clean. Her tone is like cognac by the fire with the kids in bed and a quiet house after a fun days end. (Where's the puke bucket!) Seriously though she has a very pretty voice with a low break angle at the bridge that enhances the pianissimo or soft touch playing. She can be strummed hard too maintaining great string separation with a volume that has slightly less amplitude than Spruce. I love it!

The X bracing on the top plate is Engleman Spruce with carbon fiber for added stiffness. The lower bout was carved thinner than the upper bout to ready the guitar for a floating humbucker. The guitar could easily be left alone as is or one could also use a K&K pickup with a remote preamp. I think it would cool to have both a humbucker and a K&K together with stealth controls on a pick guard.

I had weight savings as one of my themes. The heel of the neck is largely made of Bass wood as is the glue surface for the top and back plates. I shaved the guitar sides down to 4.5mm with a tolerance of .25mm in either direction. Again, leaving the neck to waist a bit thicker than the lower bout. Having more mass in the upper bout is good for fighting feed back and is known for producing better sustain.

In my previous guitars I have used through laminations of carbon fiber cloth in my necks. The carbon fiber stiffens the neck and helps it combat the effects of humidity changes and also gives lots more strength where the wood fibers are at their shortest in the 15 degree transition to the peg head. Eve's neck was done differently. I routed in two 1/4" wide by 3/16" deep troughs that followed the taper of the neck. I filled these areas with carbon fiber and Spruce struts. The struts run right into the peghead to add strength in the short grain area and keep the neck nice and true with little fear of twisting. A two way adjustable truss rod is also employed.

The scale length is 25" with a 12" radius. The action is text book with 5/64" clearance at the 12th fret. The nut is 1 13/16th. The extra width is great for players who switch from classical to archtop. Keeping with that idea I used 10 to 50 bronze strings - nice and light - so easy to play. Note bending is made easier too without feeling crowded.

Eve is a Jazz machine.

Tuesday, December 1, 2009